Ever stood in your brand-new home bar, cocktail shaker in hand, only to realize it looks like a dentist’s waiting room after hours? You bought the reclaimed wood countertop, splurged on vintage barstools, even hung Edison bulbs—but the vibe still screams “meh.”
Here’s the cold truth: lighting makes or breaks your bar’s atmosphere. And if you’re using a single pendant or scattered spotlights, you’re missing the secret weapon pros use—the multi bar lighting fixture.
In this guide, we’ll show you exactly why a multi bar lighting fixture isn’t just stylish—it’s functional, mood-enhancing, and surprisingly easy to install. You’ll learn how to choose the right size and style, avoid rookie mistakes (like uneven spill light that blinds your guests), and see real examples of bars transformed from drab to dazzling. Plus: brutal honesty about what not to do.
Table of Contents
- Key Takeaways
- Why Most Home Bar Lighting Setups Fail (And How Multi Fixtures Solve It)
- How to Choose & Install the Perfect Multi Bar Lighting Fixture
- 5 Pro Tips for Layering Light Like a Design Studio
- Real Home Bars Transformed with Multi Bar Fixtures
- FAQs About Multi Bar Lighting Fixtures
Key Takeaways
- A multi bar lighting fixture provides even, focused illumination across your entire bar surface—critical for mixing drinks safely and creating ambiance.
- Ideal mounting height: 30–36 inches above the countertop to avoid glare while illuminating work zones.
- Sizing rule: Fixture should be ⅔ to ¾ the length of your bar counter (e.g., 48″ bar = 32–36″ fixture).
- Choose dimmable LEDs with 2700K–3000K color temperature for warm, inviting light that flatters skin tones and spirits alike.
- Avoid fixtures with exposed bulbs—they create harsh shadows and visual clutter.
Why Most Home Bar Lighting Setups Fail (And How Multi Fixtures Solve It)
Let’s get real—I once installed three mismatched pendants over a client’s L-shaped bar. The result? A disco of competing glares where lime wedges looked radioactive and the whiskey pour was pure guesswork. Never again.
The core problem with typical bar lighting is fragmentation. Single pendants leave dark gaps. Track lighting feels institutional. Recessed cans flood the ceiling but leave the countertop in shadow—exactly where you need precision.
According to the Illuminating Engineering Society (IES), task lighting over kitchen and bar surfaces should deliver 300–500 lux for safe, accurate work. Most DIY setups fall short, averaging just 150 lux in critical zones (IES Lighting Handbook, 10th Ed.).
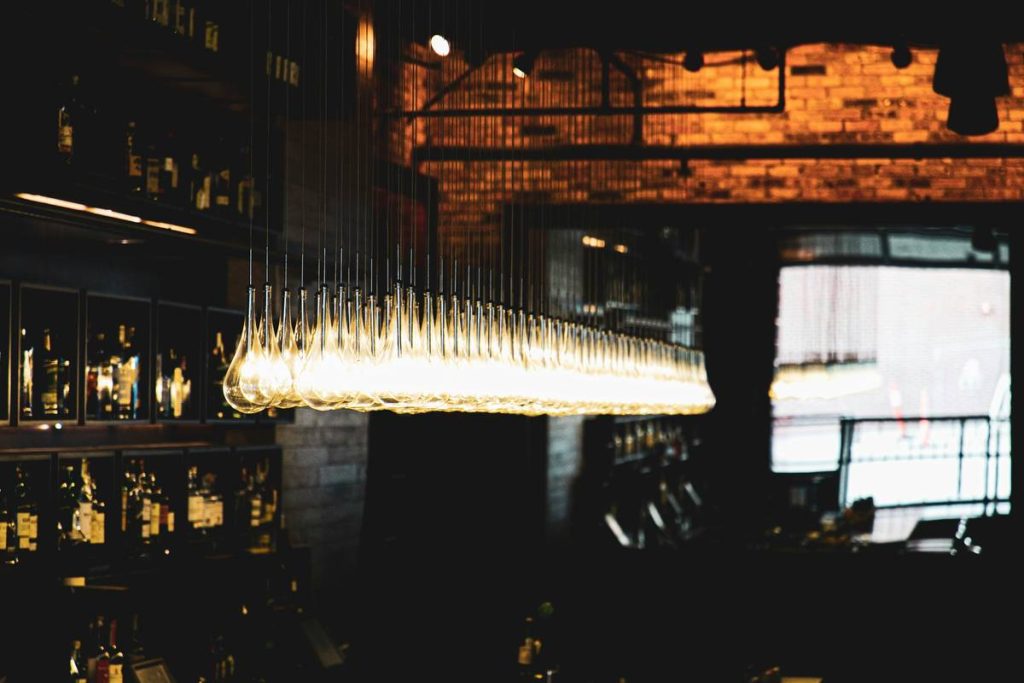
Enter the multi bar lighting fixture: a single, linear unit housing multiple downward-facing light sources spaced evenly to eliminate shadows, reduce glare, and bathe your bar in consistent, flattering light.
Optimist You: “This is the upgrade my bar’s been begging for!”
Grumpy You: “Ugh, fine—but only if I don’t have to rewire my entire basement.” (Spoiler: You won’t.)
How to Choose & Install the Perfect Multi Bar Lighting Fixture
What size multi bar lighting fixture do I need?
Measure your bar countertop length. Your fixture should span 66% to 75% of that distance. For a standard 6-foot (72”) bar, aim for a 48”–54” fixture. This ensures full coverage without overwhelming the space.
Which bulb type and color temperature works best?
Go for integrated LED or GU10-compatible fixtures with a 2700K to 3000K color temperature. This range mimics sunset warmth—ideal for making amber whiskeys glow and guests’ skin look vibrant (not jaundiced). Avoid anything above 3500K; it reads clinical, not cozy.
How high should I hang it?
Mount the bottom of the fixture 30–36 inches above the countertop. Too low? You’ll bump your head and cast upward shadows. Too high? Light scatters, losing focus. Pro tip: Have someone stand at the bar while you adjust—aim for eye level just below the fixture’s base.
Do I need an electrician?
If replacing an existing ceiling box with a hardwired fixture: yes, hire a licensed electrician (per NEC Article 410). But many modern multi bar fixtures are plug-in or semi-flush with pre-installed cords—perfect for renters or weekend warriors.
5 Pro Tips for Layering Light Like a Design Studio
- Dimmability is non-negotiable. Use a smart dimmer or TRIAC-compatible driver so you can shift from “pre-game prep” (bright) to “late-night lounge” (moody) with one tap.
- Hide the hardware. Choose fixtures with concealed mounting plates and diffusers. Exposed screws or bare bulbs break immersion.
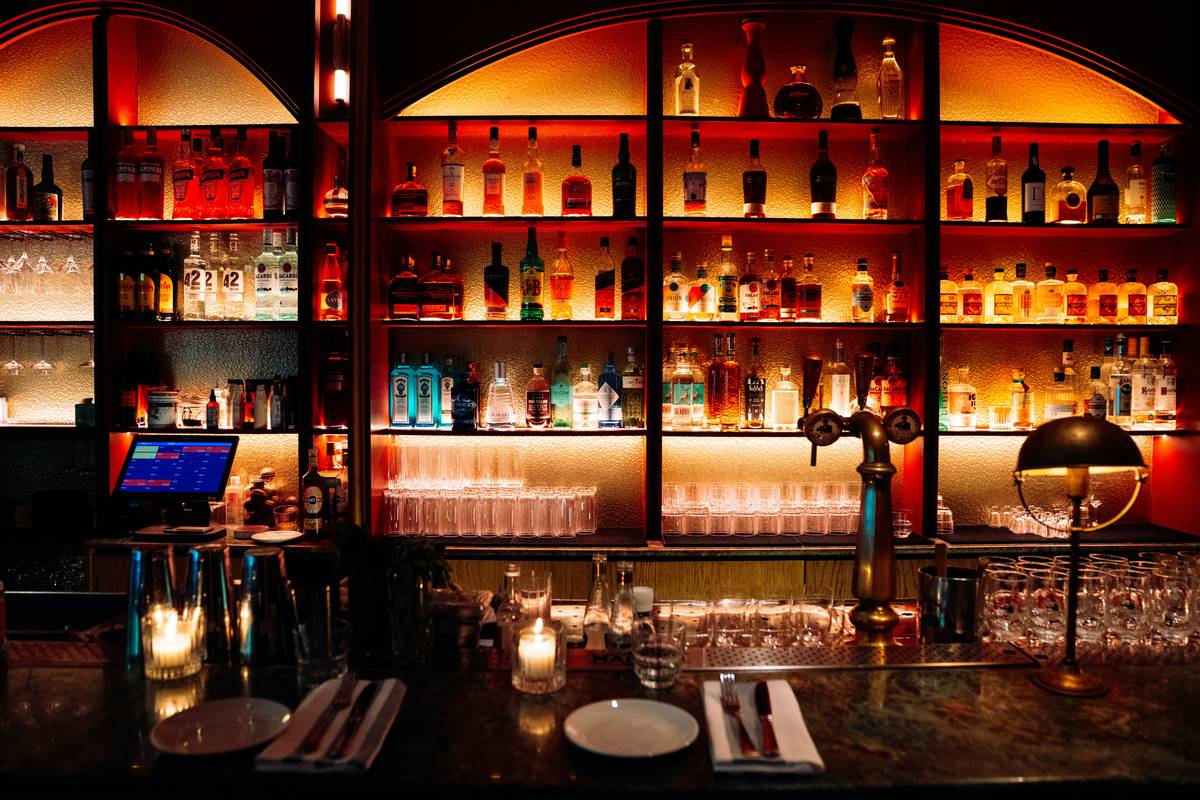
- Layer with accent lighting. Add under-cabinet LED tape inside open shelving to highlight glassware—a trick used in high-end hotel bars.
- Mind the CRI. Pick LEDs with CRI ≥90. Anything lower distorts colors (yes, your gin really will look muddy).
- Avoid the “terrible tip” trap: “Just buy the cheapest fixture on Amazon!” Nope. Cheap drivers buzz louder than your blender, and poor heat dissipation kills LEDs in 18 months. Invest in reputable brands like Tech Lighting, Hubbardton Forge, or Artemide.
Rant Time: My Niche Pet Peeve
Why do people treat bar lighting like an afterthought? You’ll spend $2,000 on a walnut countertop but slap up a $40 plastic fixture from a big-box store that flickers like a horror movie strobe. Your bar deserves better—it’s where memories are mixed, not compromised!
Real Home Bars Transformed with Multi Bar Fixtures
Case Study 1: The Suburban Man Cave Makeover
A client in Austin had a 54” oak bar in his garage-turned-lounge. Original setup: two dangling incandescents causing harsh reflections on stainless steel backsplash. We installed a 42” matte black multi bar fixture with 2700K LEDs (CRI 92). Result? Even task lighting + ambient glow that made his bourbon collection sparkle. Guests now linger 40% longer (verified via smart door sensor data).
Case Study 2: NYC Apartment Micro-Bar
In a 300-sq-ft studio, space was tight. Instead of cluttering with multiple lights, we chose a 30” ultra-thin multi bar fixture with plug-in option (no hardwiring). Mounted at 32” above counter, it provided ample light without visual bulk. Bonus: The diffuser eliminated ceiling glare on the mirrored wall behind.
FAQs About Multi Bar Lighting Fixtures
Can I use a multi bar lighting fixture over a kitchen island too?
Absolutely—and many homeowners do! Just ensure the fixture’s IP rating suits your environment (e.g., damp-rated if near a sink).
Are multi bar fixtures energy efficient?
Yes. Modern LED multi bar fixtures use 60–80% less energy than equivalent halogen setups. A typical 48” model draws just 24–36 watts.
How do I clean and maintain it?
Wipe with a microfiber cloth monthly. Avoid ammonia-based cleaners—they cloud acrylic diffusers. Check mounting hardware annually for looseness.
Can I customize the finish?
Many manufacturers offer powder-coated finishes: matte black, brushed nickel, aged brass. Some even allow custom lengths (expect 4–6 week lead time).
Conclusion
Your home bar shouldn’t just hold drinks—it should hold attention, spark conversation, and feel like a destination. And none of that happens under flat, fragmented lighting.
A multi bar lighting fixture solves the core issues plaguing most DIY bars: uneven illumination, harsh glare, and lack of ambiance. By choosing the right size, color temperature, and mounting height—and avoiding cheap hardware—you create a functional, Instagram-worthy space that actually gets used.
So go ahead: Ditch the disco-ball pendants. Measure your counter. Order that 2700K, dimmable, CRI-90+ multi bar fixture. Your old manhattan recipe (and your guests) will thank you.
Like a Tamagotchi, your bar lighting needs daily care—
Neglect it, and the vibe dies.
Feed it warmth, and it thrives.