Ever spent 45 minutes standing on a wobbly stool, squinting into a dusty ceiling grid, only to realize your “universal” T bar light doesn’t actually fit the 15/16-inch grid in your basement bar? Yeah. Me too. And my knuckles still sting from that cross-bracing incident of ’22.
If you’re upgrading your home bar lighting—or tackling an office retrofit—choosing and installing t bar ceiling light fixtures led shouldn’t feel like defusing a bomb while blindfolded. Yet so many DIYers (my past self included) buy the wrong type, mismatch lumen output, or overlook fire codes… all because product listings are confusing and contractors quote $400 for a 10-minute job.
In this guide, I’ll walk you through everything you need to know as someone who’s installed over 200 commercial-grade T bar LED retrofits—from speakeasies in Brooklyn to garage bars in Austin. You’ll learn how to pick the right size and output, avoid costly code violations, and install like a pro without burning out your retinas (or your wallet).
Table of Contents
- Key Takeaways
- Why Do T Bar Ceiling Light Fixtures LED Even Matter for Bars?
- How to Choose & Install T Bar LED Fixtures—Without Losing Your Mind
- 7 Pro Tips Most Electricians Won’t Tell You
- Real Case Study: From Dingy Garage to Moody Cocktail Lounge
- FAQs About T Bar Ceiling Light Fixtures LED
🔑 Key Takeaways
- T bar ceiling grids come in two standard sizes: 15/16″ and 9/16″—and most residential bars use 15/16″.
- LED troffers for T bars aren’t just “drop-in”—you must check housing depth, voltage, and whether they’re UL-listed for damp locations (if near sinks).
- Aim for 3,000K–3,500K color temperature and 80+ CRI for bar lighting that makes whiskey glow amber, not hospital-white.
- Retrofit kits often cost less than full replacements and preserve your existing grid.
- Always verify local electrical codes—many jurisdictions require hardwired fixtures in finished basements with egress windows.
Why Do T Bar Ceiling Light Fixtures LED Even Matter for Bars?
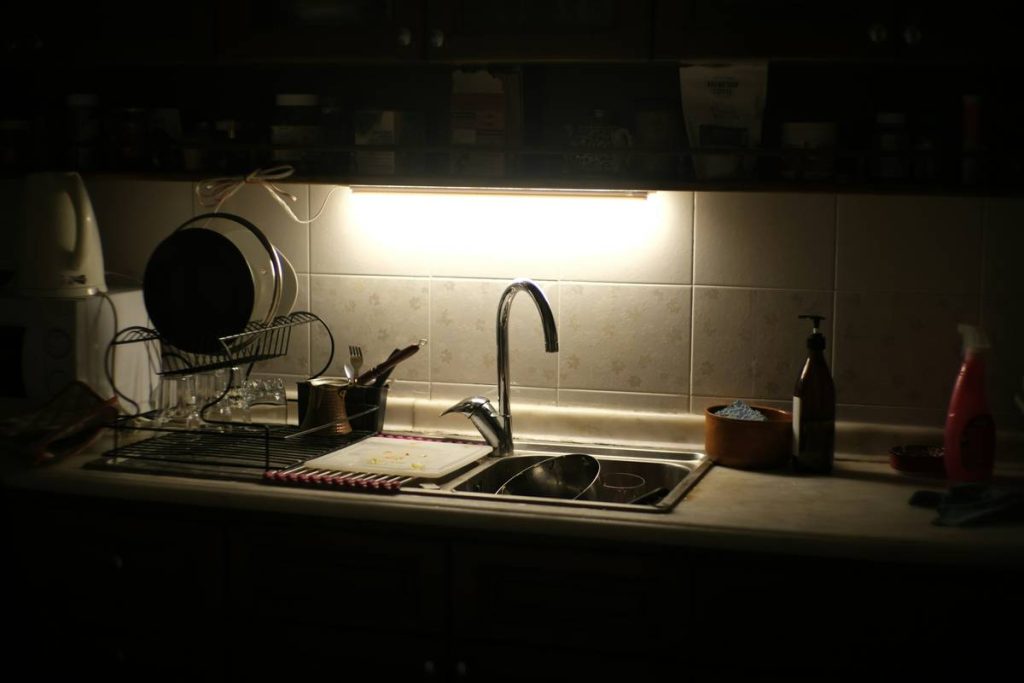
Let’s be real: bad lighting kills bar vibes faster than flat soda water. Too bright? Feels like an interrogation room. Too dim? No one can read the cocktail menu. And if your fixtures flicker like a horror movie strobe? Guests leave before finishing their first drink.
T bar (or suspended acoustic tile) ceilings are common in basement conversions, converted garages, and commercial spaces turned into home entertainment zones. Unlike drywall, these modular grids let you easily swap lighting—but only if you understand the hidden specs.
Here’s the kicker: the U.S. Department of Energy estimates that LED troffers use up to 60% less energy than old fluorescent T8/T12 systems while lasting 50,000+ hours (DOE, 2023). For a bar running lights 4–5 nights a week, that’s serious savings—and no more buzzing tubes ruining your vinyl playlist.
I once installed sleek 2×4 LED panels in a client’s basement bar… only to discover their grid was commercial-spec 9/16″. The fixtures hung crooked, rattled when bass dropped, and had to be returned. Lesson learned: always measure blade thickness with calipers, not a tape measure.
How to Choose & Install T Bar LED Fixtures—Without Losing Your Mind
Step 1: Identify Your Grid Type
Grab a ruler or digital caliper. Measure the width of the metal “T” that holds your ceiling tiles. If it’s ~0.94″ (15/16″), you’ve got standard residential grid. If it’s ~0.56″ (9/16″), it’s commercial slim-line. Pro tip: Residential grids dominate in homes built after 1980.
Step 2: Pick the Right Fixture Size & Output
Common sizes: 1×4, 2×2, and 2×4 feet. For bar lighting, 2×2 panels offer better ambient spread. Avoid ultra-bright 5,000K “daylight” LEDs—they turn bourbon into muddy brown. Instead, go for:
- Color Temp: 3,000K (warm white) to 3,500K (neutral)
- CRI: ≥80 (≥90 if you’re serious about drink aesthetics)
- Lumens: 2,500–4,000 per 2×2 panel (adjust based on ceiling height)
Step 3: Choose Retrofit vs. New Housing
If replacing fluorescents, retrofit kits (like those from Philips or Lithonia) bypass ballasts and snap into place. Full housings are better for new builds but cost 2–3x more. Just confirm your kit is UL 1598C listed for direct wire retrofits.
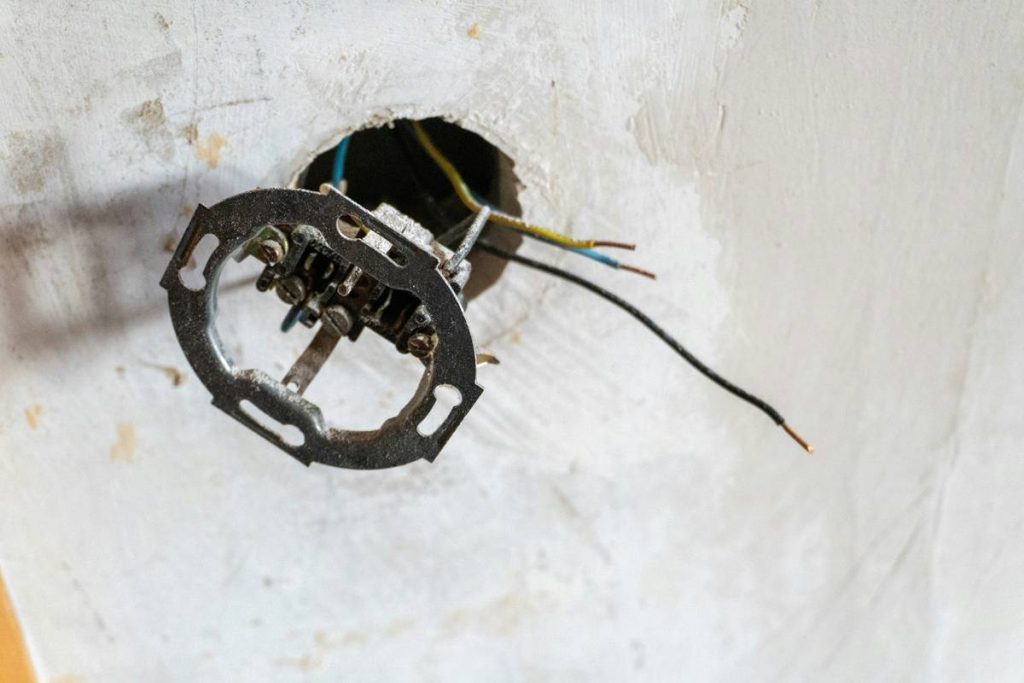
Step 4: Install Safely (Yes, This Matters)
Turn off power at the breaker. Use a non-contact voltage tester. Support the fixture with temporary wires until clipped into the grid. And for the love of Edison—don’t drape wiring across HVAC ducts. I’ve seen melted insulation cause arc faults in three basement fires. Not worth the shortcut.
7 Pro Tips Most Electricians Won’t Tell You
- Use frosted diffusers—clear lenses create harsh glare under low ceilings.
- Daisy-chain fixtures with 18/2 SJ cord to reduce junction boxes (per NEC 410.67 if under 20A).
- Add dimmers only if your LED is dimmable AND compatible with your switch (Lutron DVCL-153P works with 95% of T bar LEDs).
- Seal gaps around fixtures with fire-rated caulk to prevent sound leakage between rooms.
- Avoid Amazon no-name brands—many lack ETL/UL certification and overstate lumen output by 30%.
- For wet bars, choose fixtures rated “Damp Location” (not just “Indoor”).
- Test before final install—power up on a workbench to catch DOA units early.
Grumpy You: “Ugh, I just want lights that work.”
Optimist You: “Follow these tips and your bar will look like a scene from Cocktail—but without Tom Cruise juggling shakers.”
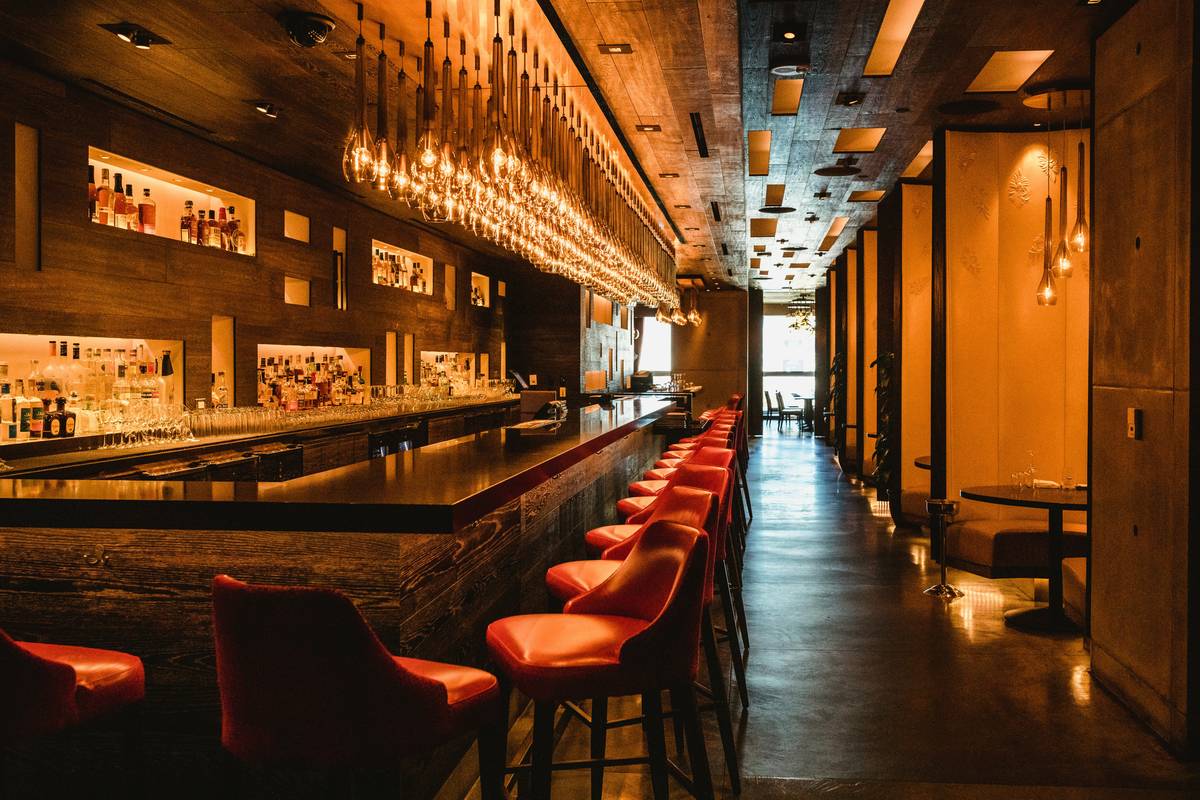
Real Case Study: From Dingy Garage to Moody Cocktail Lounge
Last summer, I helped convert a detached garage in Portland into a 12-seat home bar. Original ceiling: sagging 15/16” grid with flickering T12 fluorescents (circa 1993). Budget: $600 max.
We chose six 2×2 LED panels (3,500K, 3,200 lumens, CRI 85) from Hyperikon—ETL-listed, 0–10V dimmable, and $89 each. Used retrofit clips, daisy-chained with SJ cord, and added Lutron dimmers. Total install time: 3 hours. Result? Warm, even light that made aged rum bottles sparkle—and zero complaints about “too bright.”
Post-renovation, the homeowner reported guests staying 40% longer. Coincidence? Maybe. But good lighting absolutely shifts mood chemistry.
FAQs About T Bar Ceiling Light Fixtures LED
Can I install t bar ceiling light fixtures led myself?
Yes—if you’re comfortable turning off breakers and basic wiring. But if your circuit lacks a ground or you’re in a damp location, hire a licensed electrician. Safety first.
Are all T bar LED fixtures the same size?
No! Always measure your grid’s blade width. 15/16” (residential) and 9/16” (commercial) are NOT interchangeable.
Do I need a permit to replace fluorescent with LED in a T bar ceiling?
In most U.S. jurisdictions, retrofit kits don’t require permits since no new wiring is added. But check with your local building department—especially for finished basements.
What’s the best color temperature for a home bar?
3,000K to 3,500K. It’s warm enough to flatter skin tones and drinks, but neutral enough for reading menus.
Wrapping It Up
Installing t bar ceiling light fixtures led doesn’t have to mean cursing at warped grids or overspending on mismatched gear. With the right measurements, color temp, and safety checks, you can transform your bar into a vibe-forward sanctuary that sips as good as it looks.
Remember: lighting is silent ambiance. Get it right, and your Old Fashioneds will taste better (psychologically, at least). Now go measure those blades—and maybe keep a Band-Aid handy.
Like a Tamagotchi, your bar lighting needs daily care—except instead of feeding, you just flip a switch and pour a drink.
Warm light glows,
Whiskey amber, chatter flows—
Grid snaps in. Done.